Prerequisites
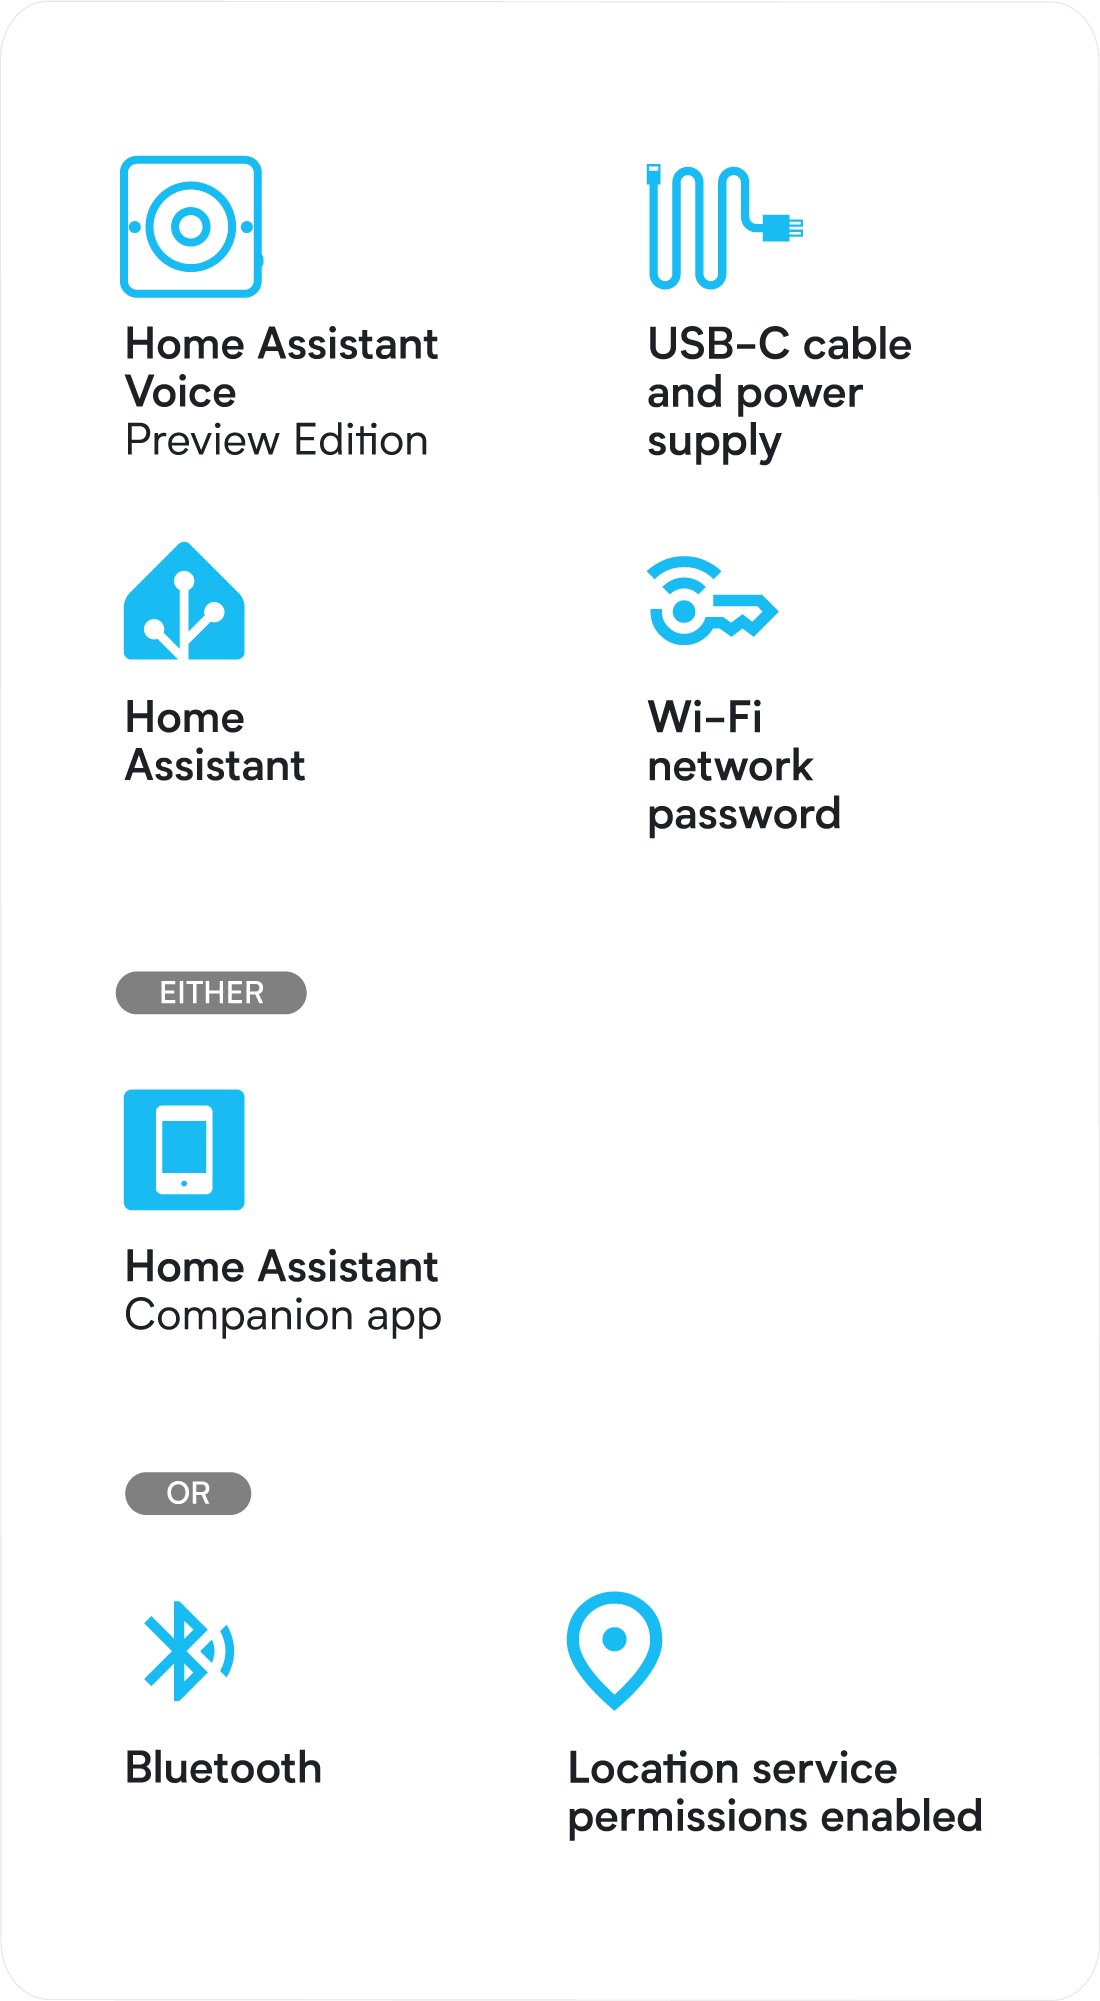
- Home Assistant Voice Preview Edition
- USB-C cable and USB power supply (these are not included in the box)
- Home Assistant installation.
- Make sure you have the most recent version installed.
- If you do not have Home Assistant installed yet, refer to the installation documentation for instructions.
- This guide was tested using Home Assistant Operating system on Home Assistant Yellow and on Home Assistant Green.
- Logged in to Home Assistant with a user that has Administrator rights.
- To check if a user has Administrator rights, you need to be logged in with Administrator rights. Go to Settings > People and check the settings for that user.
- The password to your Wi-Fi network
Onboarding via phone
Using your iPhone/Android is the easiest way to connect your Home Assistant Voice to your Wi-Fi network.
- Have the Home Assistant companion app installed on your iPhone or Android and configured to connect to your Home Assistant instance. Make sure the version is up to date.
- You are logged in to your Home Assistant Companion app with a user that has Administrator rights.
- On your phone, make sure Bluetooth is enabled.
- Make sure the Home Assistant Companion App has Bluetooth permission:
- On iPhone, go to Settings > Privacy & Security and enable Bluetooth for Home Assistant.
- For Android: make sure you’ve enabled precise location service permissions for Home Assistant. It is used for onboarding only. You can disable it again afterward.
- Go to Settings > Apps > Home Assistant > Permissions and enable Location, Allow all the time and Use precise location.
Onboarding via Bluetooth
If you don't wan't to use a phone and your Home Assistant has Bluetooth: either onboard Bluetooth, or an ESPHome device set up as a Bluetooth proxy and connected to Home Assistant.
To connect the device to your Wi-Fi and Home Assistant
Step 1
Connect the device to a power source
- Use the USB-C cable to connect the device to a power source.
- Info: You should see a warm white twinkle animation.
Step 2
Open the Home Assistant UI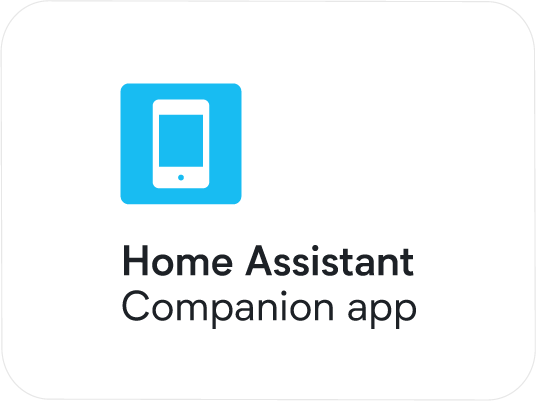
- If you're using your phone, open the Home Assistant Companion App.
- If your Home Assistant has Bluetooth, open Home Assistant in a browser.
Step 3
Add the integration
- Go to Settings > Devices & services and under Discovered, you should see the device as "home-assistant-xx Improv via BLE".
- Select Add, then Submit.
Step 4
Enter your Wi-Fi credentials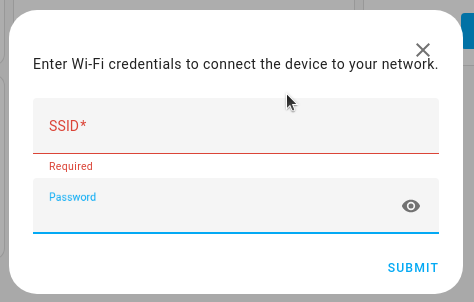
- In the SSID field, enter the name of your Wi-Fi.
- If you have different Wi-Fi names for the 2.4 GHz and the 5 GHz Wi-Fi networks, make sure you use the credentials for the 2.4 GHz network.
Step 5
Authorize the connection
- When prompted, press the center button on Home Assistant Voice.
-
- Info: This is to confirm that it is you who is trying to connect the device.
- Troubleshooting: If you now see a message “Failed to connect”, continue with the Troubleshooting steps.
- Success! Your device is now connected to your Wi-Fi. Close.
Step 6
Complete device discovery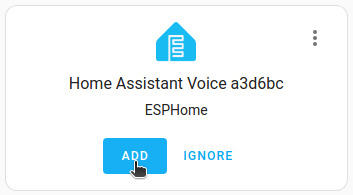
- Under Discovered, add the Home Assistant Voice XXX.
- Discovered ESPHome node: select Submit.
Step 7
Follow the wizard steps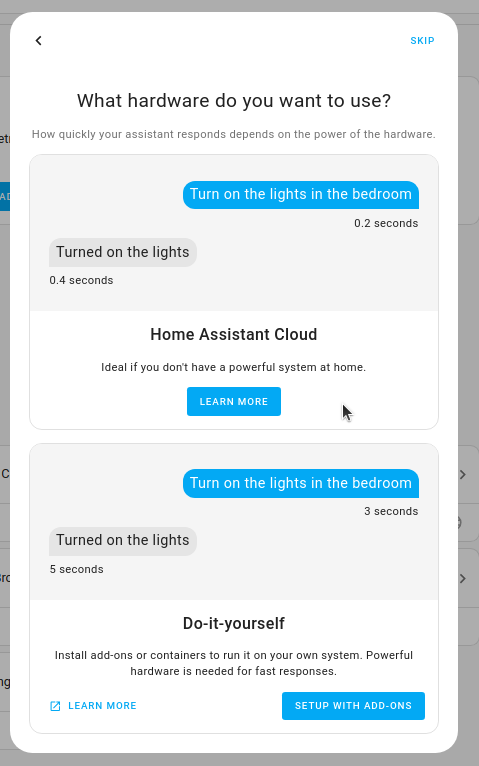
- The wizard starts checking for updates.
- Follow the instructions on screen.
- If you are connected to Home Assistant Cloud, the Cloud Assistant is used. Your job is done here.
- If you are not connected to Home Assistant Cloud, you will see a step What Hardware do you want to use?:
- Option 1: If you choose Home Assistant Cloud:
- If you already have Home Assistant Cloud account, select Log in and enter your login credentials. If not, enter email and password, select Next and follow the wizard.
- If you do not have an account yet, select Learn more, then Try 1 month for free.
- For more information, refer to the guide on Getting started with Home Assistant Cloud.
- Option 2: If you choose Do it yourself:
- Info: If you have lower-power hardware, this option is not recommended. Weaker Home Assistant hardware can lead to slow speech processing.
- Select Setup with add-ons
- Result: The required add-ons are being installed: Whisper, Piper.
- On the integrations page, under Discovered, Add the Whisper and Piper integrations.
- Option 1: If you choose Home Assistant Cloud:
Step 8
Start talking to Home Assistant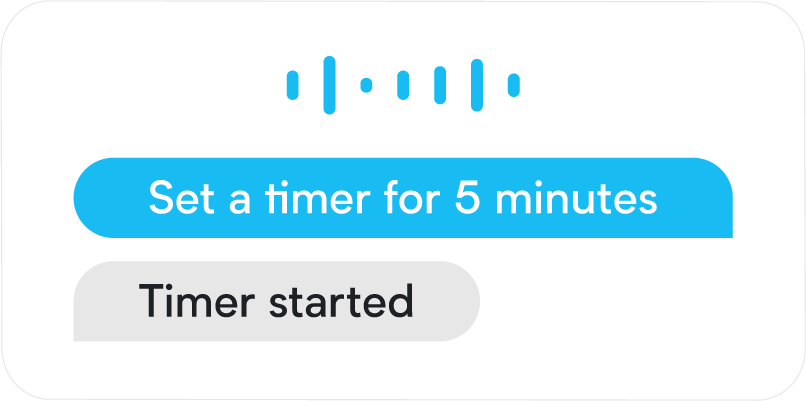
- Start controlling Home Assistant by saying a supported voice command:
- For example, “What's the time” “Turn on the light in the living room”, “Set the timer to 5 minutes”, “Is the front door locked”.
- Make sure you’re using the area name exactly as you defined it in Home Assistant.
- Troubleshooting: Is the device you want to control via Assist (for example a specific light) not responding to your voice commands? Make sure the device is exposed to Assist.